Blueprint Setup
This guide will tell you how to setup Unreal Engine for modding with blueprints.
Setting up The Project
Install Unreal Engine 5.2.
WARNING
You MUST use Unreal Engine 5.2 as it is what the game runs on.
Create a blank project named Simulatorita.

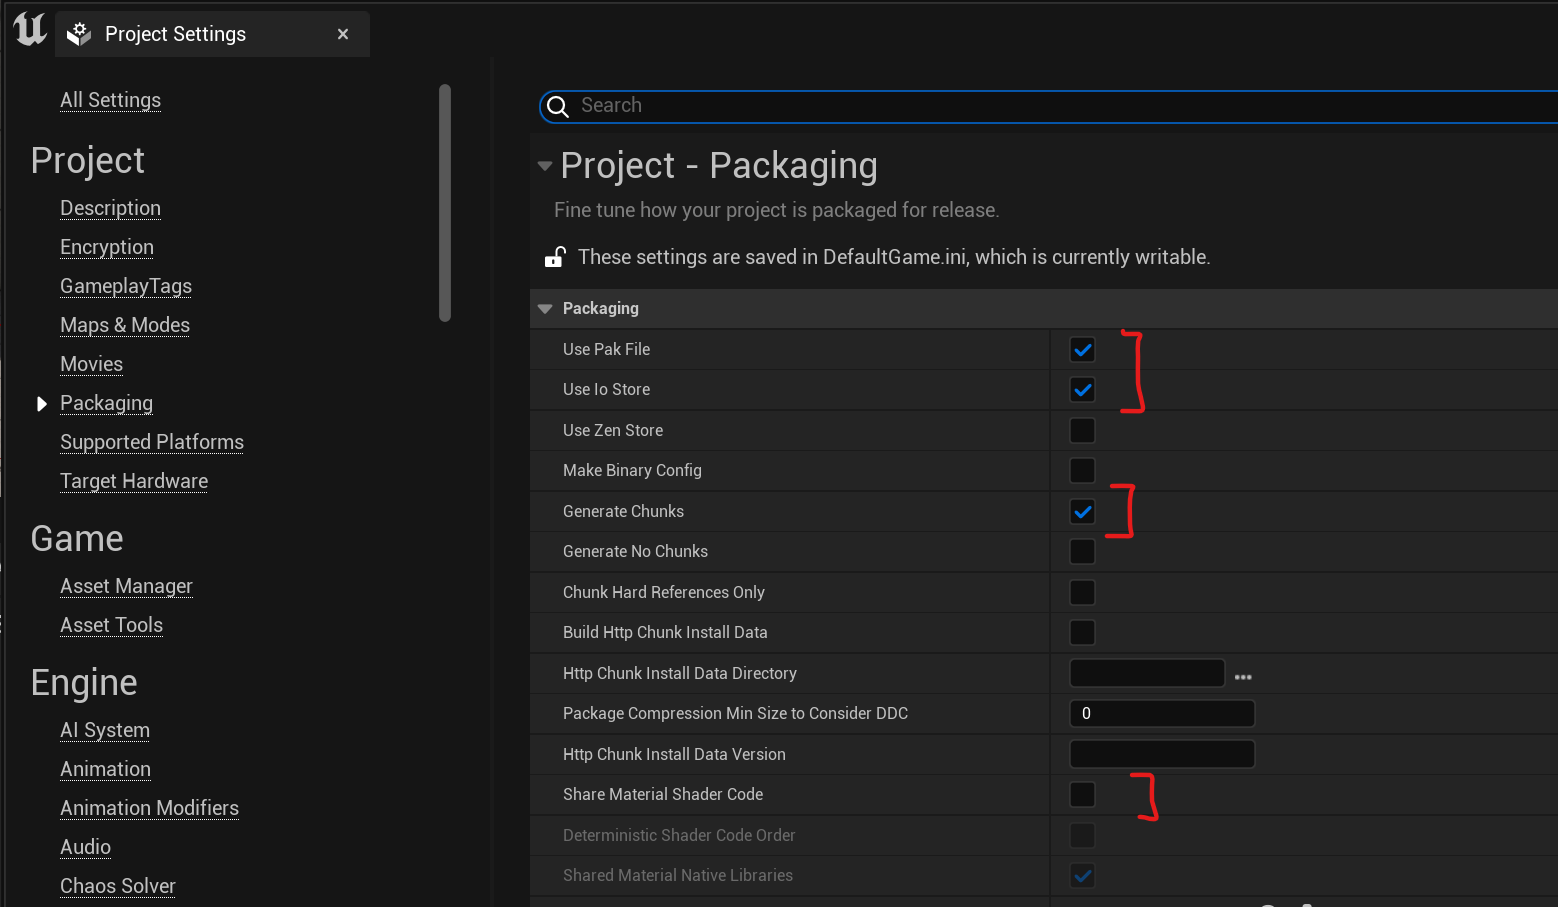
Go to Edit > Project Settings > Packaging, and ensure you have the following settings.
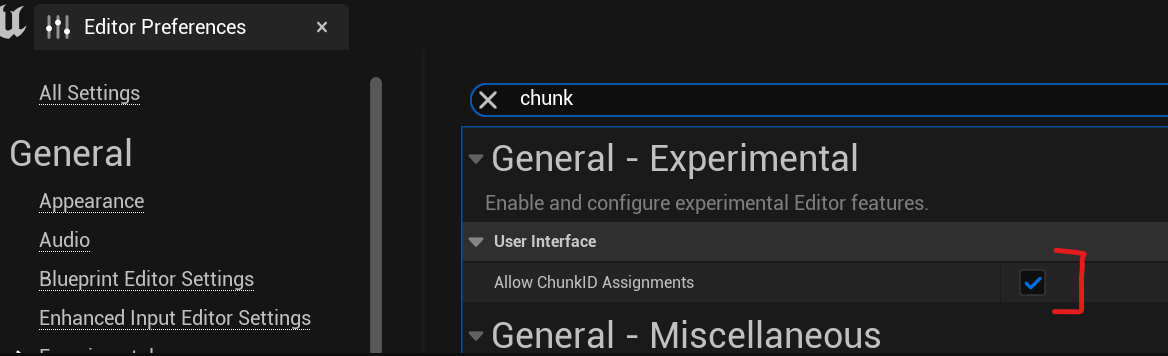
Then, go to Edit > Editor Preferences and search for Allow ChunkID assignments
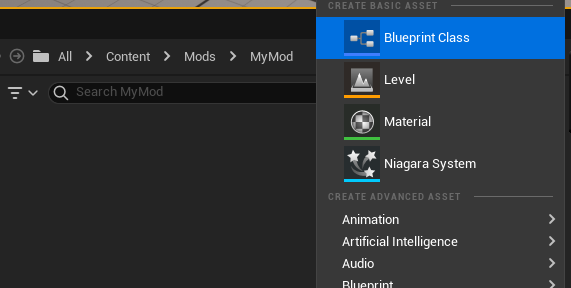
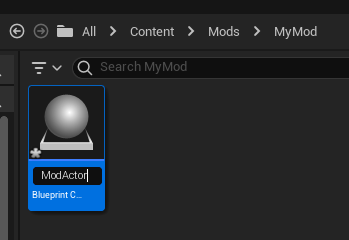
In the Content Browser, create a new folder called Mods. Then, create your mod folder and call it whatever you like, such as MyMod.
Right-click and create a new Blueprint Class.
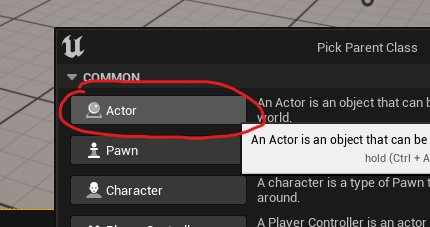
Choose the Actor class.
Once the Blueprint is created, name it ModActor.
Next, right-click and create a Miscellaneous > Data Asset with the PrimaryAssetLabel class.
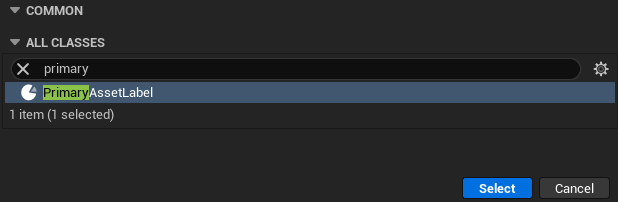
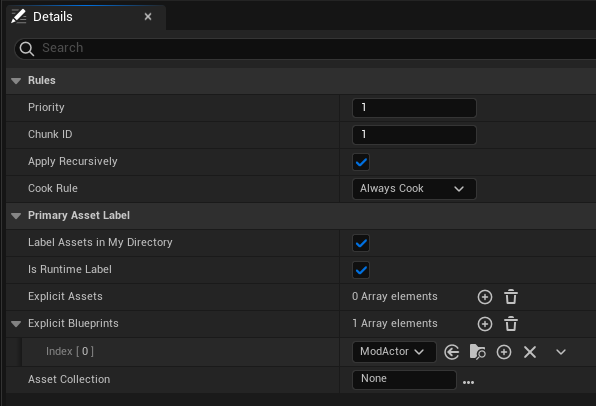
Open the NewDataAsset and edit it accordingly.
Open your ModActor's Event Graph and create 3 String Variables.
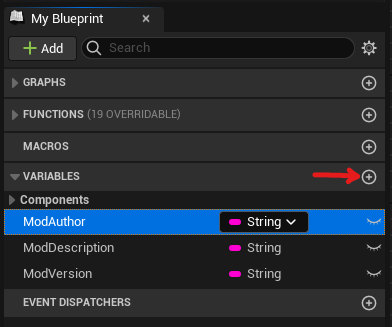
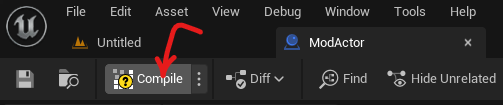
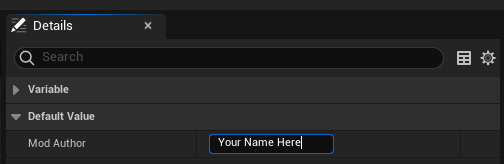
Click to Compile your blueprint and then you can edit each Variable.
Each value can be changed under Default Value.
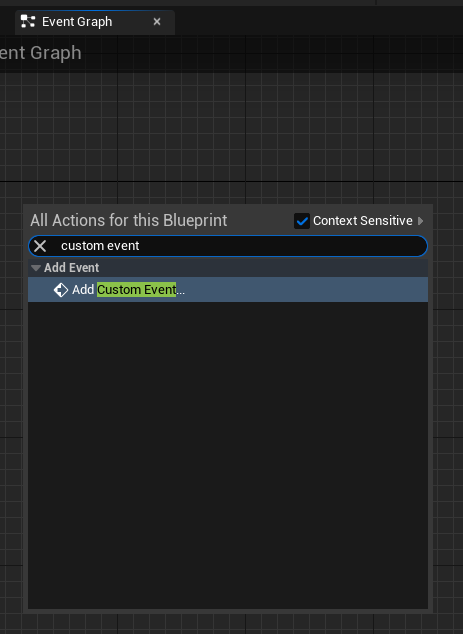
Right-click and add a Custom Event.
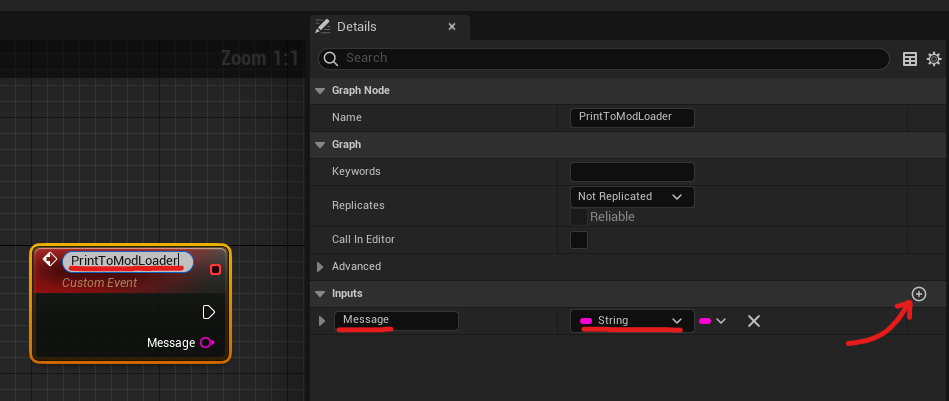
Name it PrintToModLoader, add a String input titled Message.
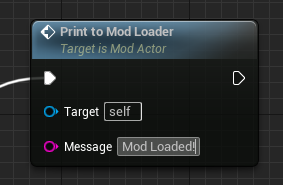
Drag off of the Event Begin Play node and search for PrintToModLoader.
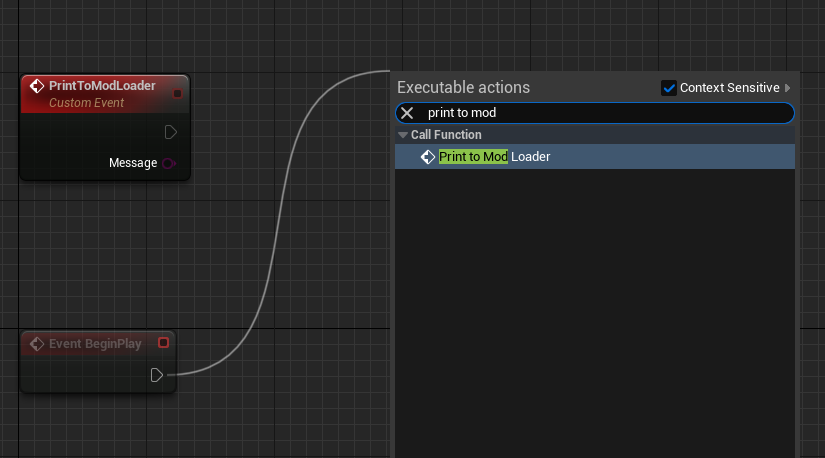
In the message input type: Mod Loaded!.
This will print Mod Loaded! when the mod loads.
Make sure to Compile your blueprint and then save your Mod Actor.
Now you can build your mod!
Check out the packaging guide to export your mod.
NOTE
Some information and screenshots taken from Dmgvol's UE Modding Guide